

Introduction
In this guide, you will learn how to configure your APP to connect it to Afilnet's services. To configure your APP, you must first have created one. If you have not done so yet, follow this guide:
https://www.afilnet.com/es/whatsapp-business/registro-desarrollador-crear-app/
On the Facebook developer platform (https://developers.facebook.com/), open your APP.
1.- Send my first automated message
The first step in configuring the application is to send an initial WhatsAPP message using the API. To do this, we will follow this procedure:
1.1.- Access the API settings
To access the API settings, go to WhatsApp > API Setup in your APP dashboard.
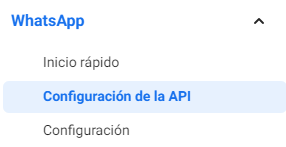
Once you access this option, you will see a series of steps to follow to configure your WhatsAPP connection.
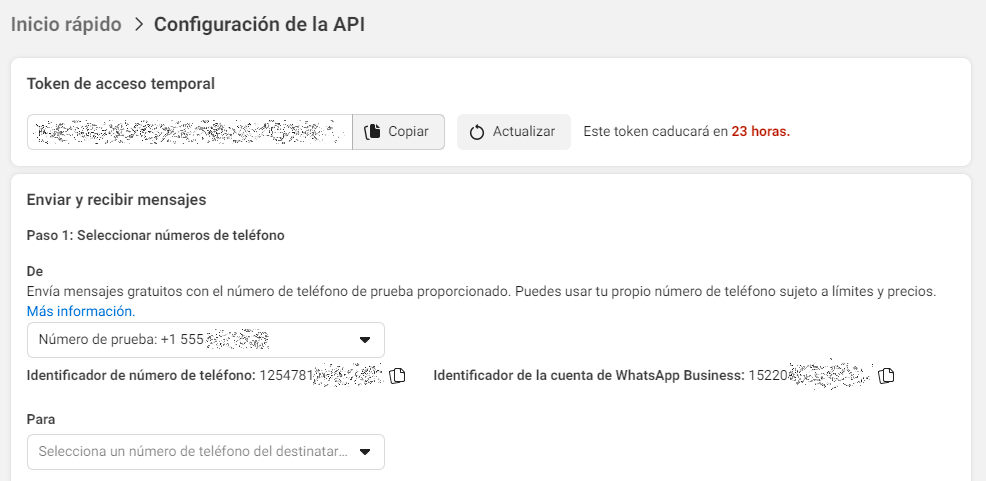
2.2.- Add a test number
Before you start sending messages to third parties, the first thing you need to do is send a WhatsAPP message to a trusted number. To do this, under "To", click "Select a phone number".
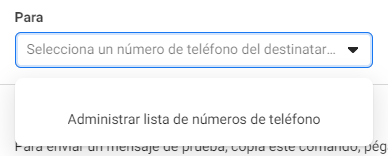
Now click "Manage phone number list". You will then be asked for a phone number, which you must verify using a code sent to you via WhatsAPP:
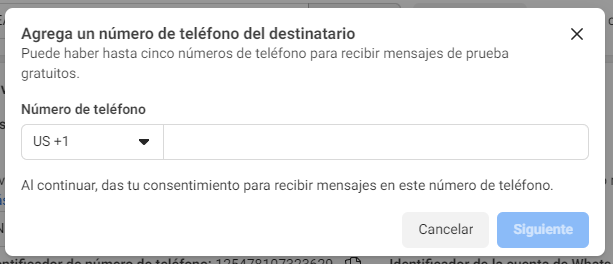
2.3.- Configure the test information in Afilnet
Once you have entered this information, you must access Afilnet to establish the first connection. Once you have logged in to your Afilnet account, go to the "Channels" section and click the "Add new channel" tab. Select the WhatsAPP channel and click "Sign up for WhatsAPP". You will then see the following window:
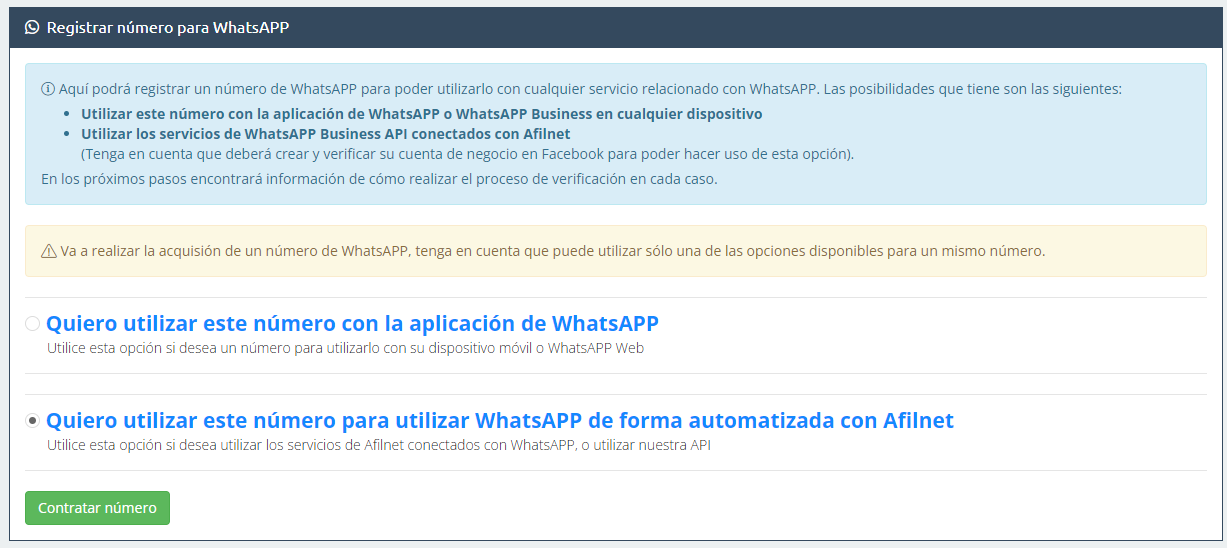
Click "I want to use this number to use WhatsAPP automatically with Afilnet", then click "Continue". You will then see the steps to follow. There are 2 preliminary steps that you should have completed to reach this point, so you can continue the process by clicking "I confirm that I have completed all the steps. Connect to Afilnet!".

You will now proceed to send your first WhatsAPP message from Afilnet. To do this, you must enter the following parameters:
- Phone number ID (This is the ID assigned by Facebook to the assigned test phone number).
- Temporary access token (This is a token assigned by Facebook for testing; it changes every 24 hours).
- Recipient's phone number (This is the test number previously registered and verified; include the country code with the number)
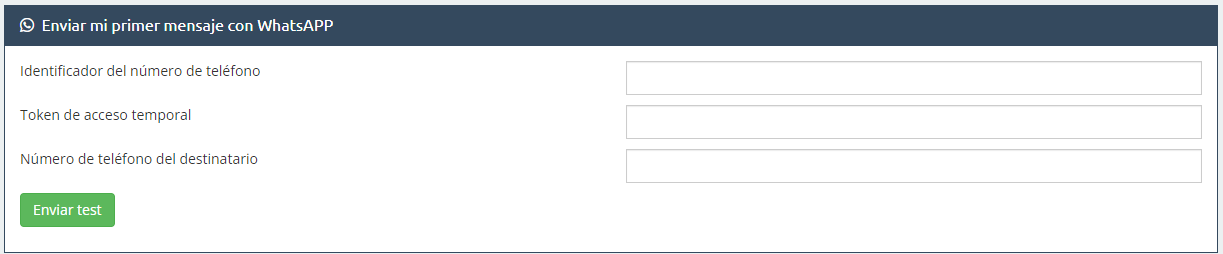
Once you have configured this information, click "Send test". If all the information is correct, you will see a confirmation message. Otherwise, it will indicate the error that occurred (Check that you have completed the entire process correctly).
2.4.- Configure Webhooks
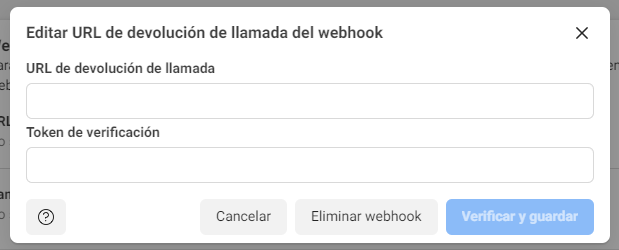
Once you have successfully sent the first message, it is time to configure Webhooks in Facebook. This configuration is mandatory for the platform to receive status changes and messages from other users at your numbers. To do this, click the "Configure webhooks" option:

Once you have accessed the Webhooks settings, you must enter the webhook and verification token:
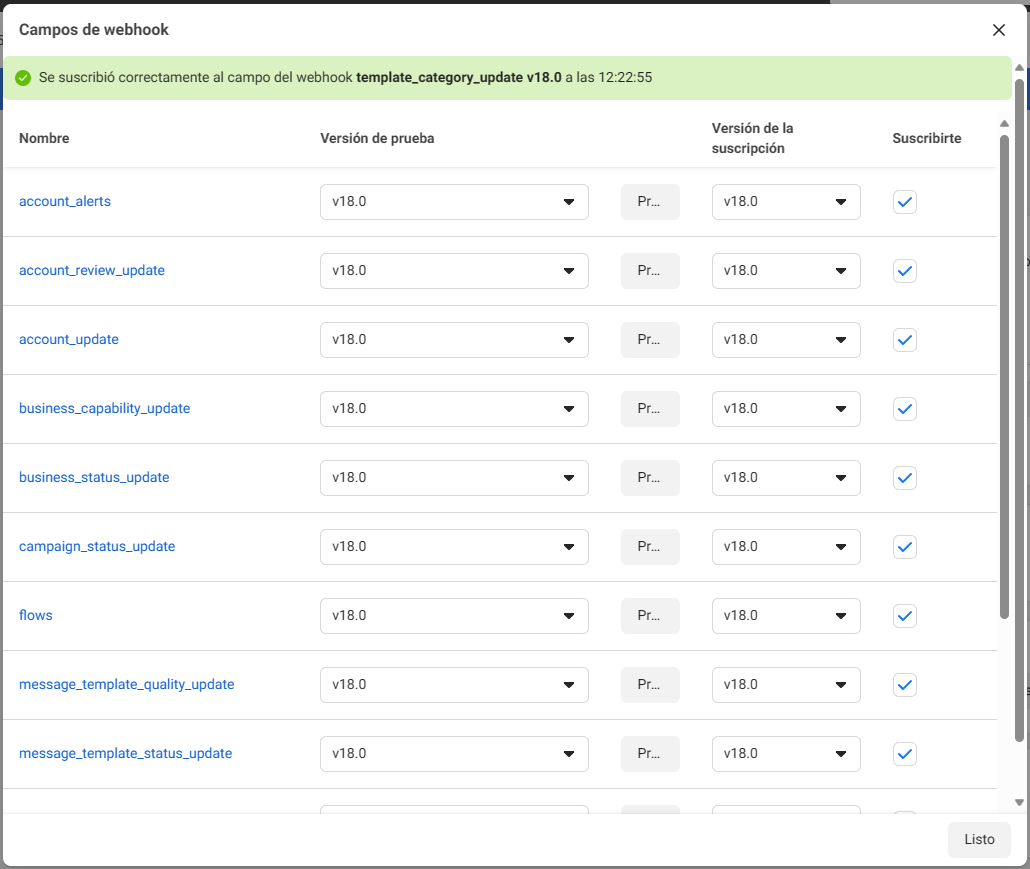
Now we need to select all the notifications to be sent. To do this, under Webhook fields, click Manage, select all the fields, and click Done:
Afilnet provides these details, and you will find them after successfully sending your first WhatsAPP message:

2.5.- Generate / Configure a permanent token
2.5.1. Obtain the business ID
To view the business ID, we will access the business settings information (https://business.facebook.com/settings/info). On the screen that appears, copy the "Business Manager ID":

2.5.2. Create a system user and a permanent token
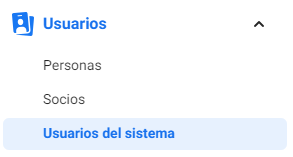
Now we need to create a "System User". This system user will allow us to manage the business and access its related services. To do this, go to business settings (https://business.facebook.com/settings/), then click System Users:
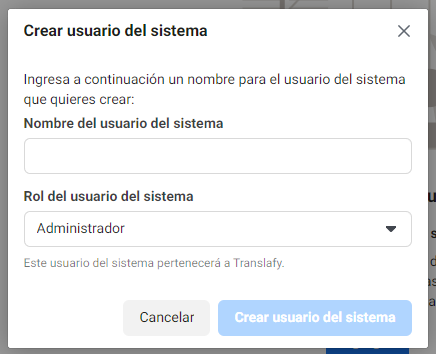
Now click "Add", and a window will open asking for the system user's name and role. Enter the desired username and select "Admin" as the role.
Once this is done, we need to generate a token and assign the system user's permissions. To do this, click Generate new token:

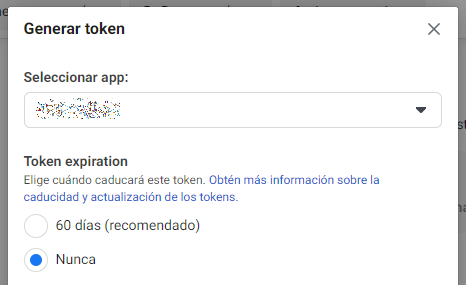
Here, select the APP you created earlier, specify that the Token should never expire, and select the permissions: business_management, whatsapp_business_management and whatsapp_business_messaging. Once this is done, click Generate Token.
2.5.3. Configure the ID and token in Afilnet
Now we will configure both values, the business ID and token, in Afilnet. If you have completed the previous steps, you will see this form on screen:
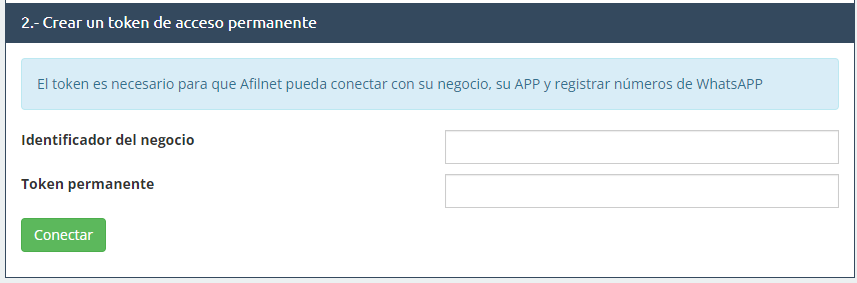
Enter the business ID and permanent token here and click Connect. If everything is correct, you will see a verification message. If there is a problem, you will see an error message; in this case, follow the instructions in the message.
2.6.- Add a phone number
Now we will configure a phone number. To do this, consider whether you need to register a phone number with Afilnet or whether you already have a phone number that you are not using for WhatsAPP (if you already have a whatsapp account on this phone, you must delete the account to configure it: https://developers.facebook.com/docs/whatsapp/cloud-api/get-started/migrate-existing-whatsapp-number-to-a-business-account/).
2.6.1.- Register a phone number for WhatsAPP in Afilnet
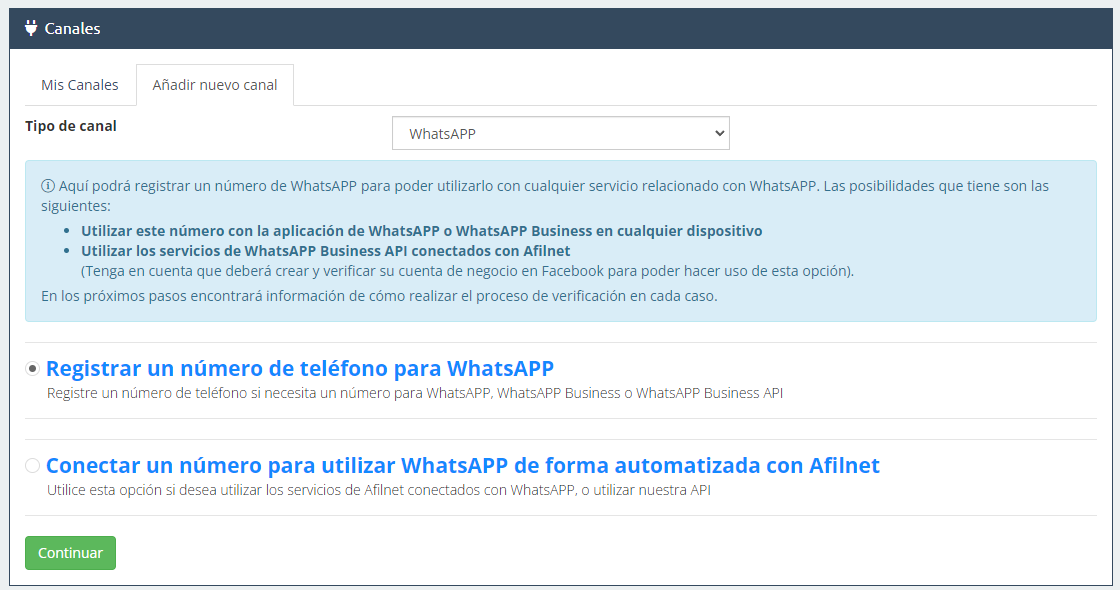
To register a phone number for WhatsAPP with Afilnet, log in to your Afilnet account and click "Channels". Select the "Add new channel" tab and select the WhatsAPP channel. On the next screen, select "Register a phone number for WhatsAPP" and click Continue:
Once you access the option to register a phone number, select the country, filter according to your preferences, and click "Search available numbers":

Review the available numbers and click "Buy" next to the number you want.
Once you have purchased the number, it is time to verify it. Please note that to verify the number, you will also need to use the next step, "Verify my phone number". Once you have entered
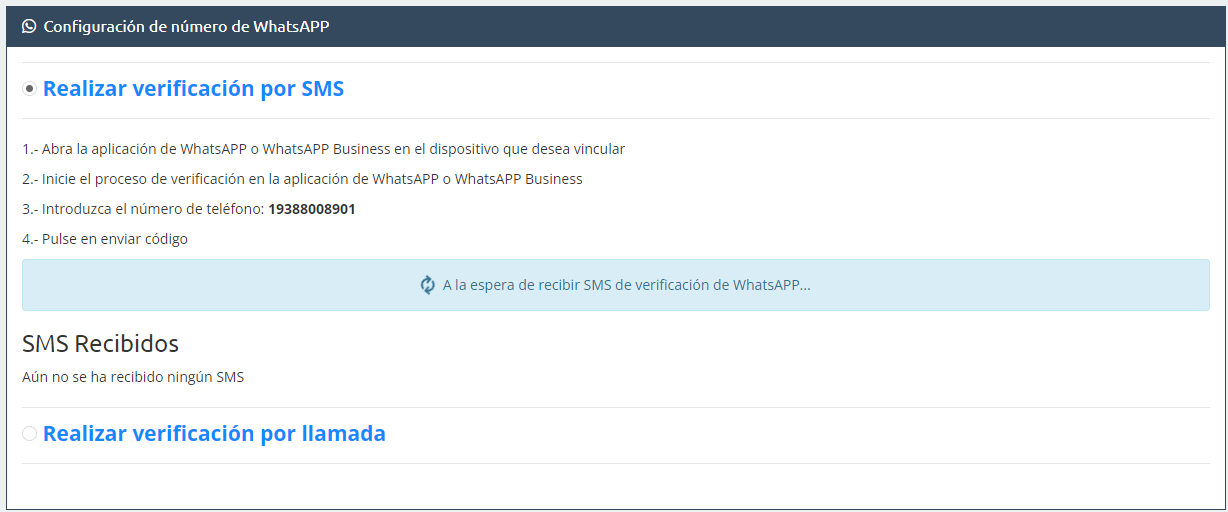
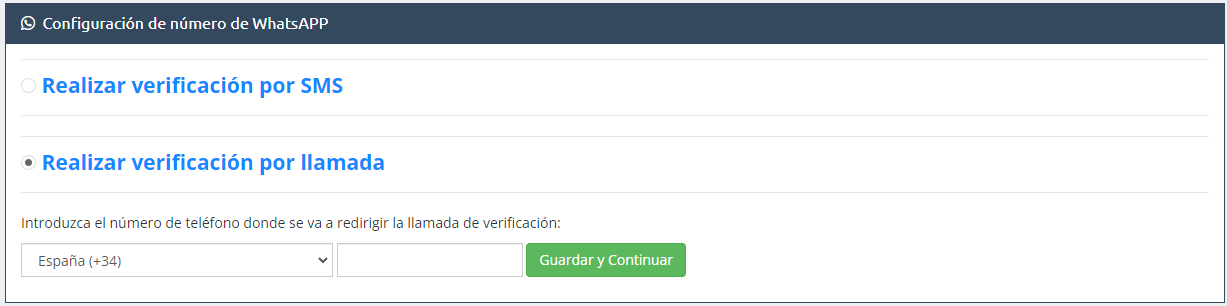
2.6.2.- Verify my phone number (whether you already have it or purchased it from Afilnet)
Log in to your Facebook developer account (https://developers.facebook.com/), select your application, and go to WhatsAPP > API Setup.

Now we will proceed to add the WhatsAPP number. On this screen, click "Add phone number". On the screen that appears, enter the phone number and select the verification method.
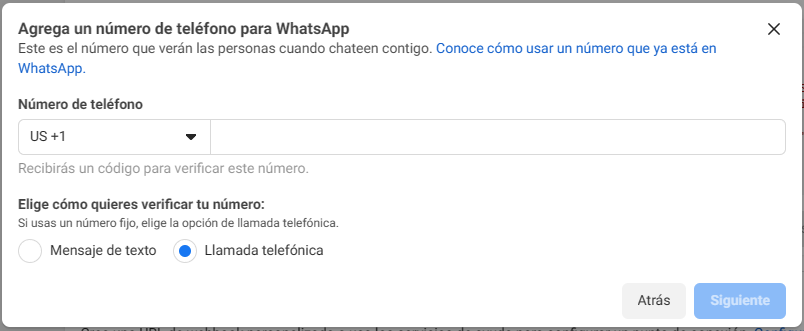
If you are verifying a WhatsAPP number registered with Afilnet, now is the time to select the same verification method you specify here. Once this is done, click Next and wait for the call or SMS with the code. You must enter this code on the verification screen Facebook displays. Once you have verified the phone number, it is time to connect your WhatsAPP number to Afilnet.
2.6.2.- Connect my phone number
To connect your phone number to Afilnet, go to Channels in your Afilnet account and select the "Add new channel" tab. Select the WhatsAPP channel, choose "Connect a phone number to use WhatsAPP automatically with Afilnet" and click Continue.

Now select the whatsapp account and the number you want to connect and click "Connect number". If you cannot find the WhatsAPP account or number you have just verified here, you will need to reconnect your Facebook account to Afilnet (2.5.3. Configure identifier and token in Afilnet).

If everything has gone well, you will be redirected to the whatsapp channel settings page and the setup process will have been completed successfully.
2.7.- Configure a payment method on Facebook
The last step in the process is to configure a payment method on Facebook. Please note that Facebook will restrict your account if you do not add a payment method, and you will very likely be unable to send or receive messages using your WhatsAPP channels. To configure the payment method, go to business settings (https://business.facebook.com/settings/) and click Accounts > WhatsAPP Accounts. Select the account where you registered the number and click "Settings". Once this is done, simply click "Payment settings" and follow the steps to add a credit card.